Monsters in the Dark
Most kids are afraid of the dark, right? There are scary monsters that are going to get them in their sleep. Well, I wanted to come up with an easy craft to bring some fun and creativity to nighttime. While traditional nightlights are inexpensive, they are boring and impersonal. I thought of a simple idea to save electricity and bring joy to kids: a foam pumpkin nightlight.

This post contains affiliate links. Using these links will not affect the cost of the product, but I do earn a very small percentage when you use my link. This helps me to keep bringing you great products, tutorials, recipes, crafts, and more! I only represent or recommend products that I believe in and use personally.
Supply List:
- Foam Pumpkin
- Mini Glue Gun
- Gorilla Glue Sticks
- DecoArt Americana Acrylic Paint Spa Blue
- Apple Barrel Acrylic Paint Snowflake
- Clear Plastic Gems
- Paring Knife
- Metallic Gold Sharpie
- Two Artist Brushes
- Small Artist Brush
- Battery-Operated Tea Lights
- Stick
- Faux Leaf

Feeling Inspired
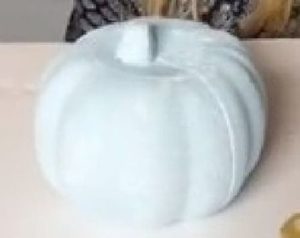
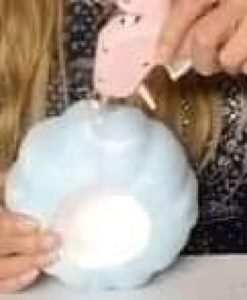
Pumpkins are traditionally orange, however, I wanted a different look for this nightlight. I wanted something soft and calming. After all, falling asleep is easier when the environment around you is calm and quiet. When I thought about a pumpkin nightlight, I thought about Cinderella riding in her pumpkin carriage to the ball. I then set out to create a Cinderella inspired foam pumpkin nightlight. I started by taking the pumpkin and putting two coats of Apple Barrel’s Acrylic Paint Snowflake on it. It’s easier to apply a lighter color to something if it is first painted white. The white coat also acts as a primer for any additional color or colors you may add. You should always let each coat of paint dry completely before applying another. Trying to paint an additional coat too early may result in previous layers coming off.

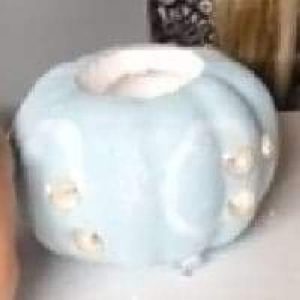
Next, I decided to use DecoArt Americana Acrylic Paint Spa Blue as the main color for my pumpkin nightlight. It is a very soft, light blue that I thought would be perfect for this project. I painted an even coat, using Spa Blue, on the entire pumpkin. You can always paint more than one coat, but I thought one was sufficient. Once the coat of paint was completely dry, I carefully cut around the top of the pumpkin just like you would if you were carving a real one.

Please be careful when using any sharp or hot tools or objects when crafting, as carelessness can result in injury!
It’s All Coming Together
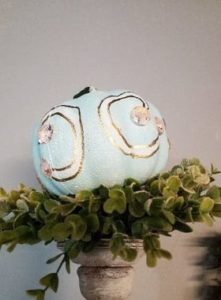
Setting the top of the pumpkin to the side, I took the Snowflake color from before and squeezed a little bit onto a plate. Taking a Small Artist Brush, I painted swirls of white around the pumpkin to add some extra details. I started heating up my Mini Glue Gun while I waited for the white swirls to dry.

Once the swirls were completely dry, I mapped out where I wanted the Clear Plastic Gems to be placed and used the hot glue gun to make holes in the pumpkin. Again, please be careful with this step! Make sure that the holes go all the way through so that the light from inside will shine through. I wanted the holes to be big enough so that the gems were flush with the pumpkin. This would make it harder for a toddler or small child to pull the gems out.

Finishing Touches

I was happy with what I had created, but I wanted to add a little something to spruce it up a bit. I decided to outline the white swirls with a metallic gold sharpie. It kept the design simple, but it gave the foam pumpkin nightlight that little sparkle that it needed. I decided to replace the stem that the pumpkin came with. I used a small stick and painted it the same Spa Blue color as the pumpkin. There was a faux leaf in my craft stash that I thought would be a perfect decoration. Once the stick was completely dry, I used the same metallic gold sharpie from before and swirled the color around the entire stick. I then glued the faux leaf to the stick before placing it in the center of the top. The only thing left was the battery-operated tea light.
I turned on the tea light and placed it inside the pumpkin, placing the top back on. Turning off the lights, I watched as the nightlight shone. You can always add more gems for as much light as you want. I was truly satisfied with what I had made.

I hope I was able to inspire you to create from the heart. Please check me out on Facebook, Twitter, Pinterest, and Instagram. This was a fun and easy craft to make. Please check out my other blog posts and have fun crafting!
How to carve an everlasting jack-o-lantern (from a foam pumpkin!)

Bette Hiltz says
Loved this, as well as your many other great crafts!
paintedlady says
thank you so much for all your love