Needing A Pop of Color
I love the background I have for when I do my lives, however, I wanted a small banner that would give my background the pop of color it needed. I decided a diy leaf banner would be perfect. Banners at the store can be pricey, but I found a way to make a diy leaf banner at a low cost. It was a simple and fun project to create, however, it took me a few different tries to find the style I love. I had completed this project once, but I was not fully satisfied so I set out to do it again.

This post contains affiliate links. Using these links will not affect the cost of the product, but I do earn a very small percentage when you use my link. This helps me to keep bringing you great products, tutorials, recipes, crafts, and more! I only represent or recommend products that I believe in and use personally.
Supply List:
- Buffalo Check Scrapbook Paper
- Buffalo Check Fabric
- Cutting Mat
- Rotary Cutter
- Hot Glue Gun
- Gorilla Glue Sticks
- Silicone Makeup Brush
- Wooden Maple Leaves
- Mod Podge
- Hemp Rope
- Iron
- Black Felt
- White Felt
- Faux Sunflowers
Getting My Materials Ready
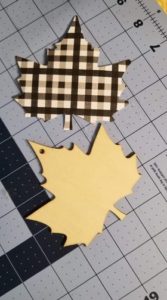
First, I decided to pre-cut my white felt, black felt, and Buffalo Check Fabric. I laid down my cutting mat and placed my white felt on top of it. Using my rotary cutter, I cut the felt into strips that were one inch thick. I set the cut white felt into a pile together and repeated the process with the black felt and buffalo check fabric. The felts and fabric were set to the side while I laid out a wooden maple leaf. Then, I placed my buffalo check scrapbook paper over top of it. I used my iron-on decoupage method in order to get all of the leaves made and ready for my diy leaf banner. The hemp rope was perfect to tie through the loop in the leaves and secure to the banner at the end.

Placing the Felts and Fabric
I started heating up my hot glue gun and laid out my hemp rope. Next, make sure it is a little longer than what you want your diy leaf banner to be so you can tie the ends off. You don’t want to get hot glue on your hemp rope, so when you are gluing your felts and fabric be sure to leave a loop big enough to fold the felts and fabric over. Place a line of glue from about an inch below the halfway line all the way to the end. Then, fold the fabric on itself and hold for a few seconds using a silicone makeup brush. Repeat this step with every piece of black felt, white felt, and buffalo check fabric. You want to make sure you glue the back of the buffalo check fabric and fold it over so that the pattern is very apparent. 
I placed my felts and fabric in a pattern along my rope. You can create any pattern you want and place the white felt, black felt, and buffalo check fabric any way you like.

Maple Leaves and Sunflowers
I started heating up my iron to a medium setting while I placed the faux sunflowers along the banner. To add the sunflowers, all I did was put a dab of hot glue on the back and place them where I wanted along the banner. Now, the maple leaves took a little longer. I placed my leaves down and brushed them all with mod podge. After waiting for the mod podge to dry, I placed the buffalo check scrapbook paper over them and ironed it down. Once the buffalo check scrapbook paper was completely ironed on, I gently sanded down the edges to get all of the excess off. I then tied some hemp rope through the holes in the top of the maple leaves and tied the leaves along the banner.
(If you would like more details on how to make the maple leaves please check out my iron-on decoupage blog post.)

Once I completed this process, I was completely satisfied with the way this diy leaf banner had turned out. I knew it would be perfect for the background during my lives. I used some tacks and hung it from the shelf that sits behind me. This truly was fun to create even though it took a few attempts. Sometimes, that happens with crafting, but patience is key. If you are patient with your craft, it will turn out great once you are finally finished.
