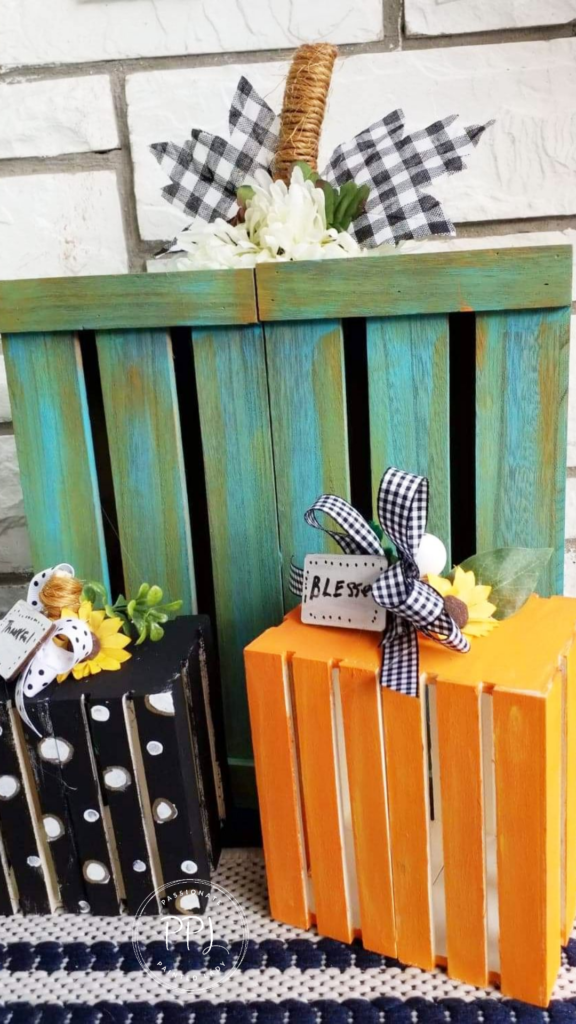
What About A Wood Crate Pumpkin?
I have been decorating for the fall season and I needed some pumpkins to go with my décor. Traditional round pumpkins are nice, but I wanted something different. Square pumpkins are an outside-of-the-box thought, right? What if I used wood crates to create a wood crate pumpkin? Of course, I can use any size I want when creating them. After all, I have to love my crafts before anyone else does. When creating, you can of course use any colors and decorations you want. I just want to show you what I love to create and I always try to inspire.

This post contains affiliate links. Using these links will not affect the cost of the product, but I do earn a very small percentage when you use my link. This helps me to keep bringing you great products, tutorials, recipes, crafts, and more! I only represent or recommend products that I believe in and use personally.
Supply List:
- glue gun
- glue sticks
- 2 wooden crates (any size you want)
- buffalo check maple leaves
- twine
- mums
- stick
- Deco Art Americana Cadmium Yellow
- Apple Barrel Paint Jack-O-Lantern
- Apple Barrel Paint Caribbean
Starting My Project
I decided to start by gluing the crates together, matching the appropriate sizes together. Start by placing glue along the seams and hold the wood crates together until the glue is dry. This should only take about five minutes to dry. Once the glue was completely dry and the crates became wood crate pumpkins, I started painting the pumpkin with the Apple Barrel Paint Caribbean. I only applied one coat of paint, allowing the grain of the wood to bleed through. A rustic look was my goal, so I didn’t want full coverage with the paint. If you watch me on my Facebook lives, you will know that turquoise is my favorite color to paint with.
After the paint dried, I put some of the Apple Barrel Paint Jack-O-Lantern in a bowl and added some water to the paint. This would make the blending easier when it came to painting over the turquoise. Next, I took Deco Art Americana Cadmium Yellow and put some in a bowl. I added water to the yellow as well to, again, make blending easier. Once the colors were blended, I was satisfied with the rustic look I had achieved.
Time To Decorate
Time to decorate my Wood Crate Pumpkin. Picking a stick was easy. After all, the world is covered in trees that leave sticks. I went outside to my backyard and picked out a stick that I thought would be perfect. I had to break it to get to the size I wanted. Because I didn’t want the stem to be too tall, I broke the stick until it was only about five or six inches long. Next, I put a line of hot glue along the stick and wrapped the twine tightly around the stick. The hot glue adhered the twine in place and made it look a little more like a pumpkin stem.
Then, I needed to make sure my wood crate pumpkin was dry. Since it was dry, I hot glued the stick to the top of the wood crate pumpkin. It started to look more and more like a pumpkin, but I thought it needed something more. Then, using the mums I had, I decorated the top of the wood crate pumpkin with them. Surrounding the newly made stem, I glued them in place. I thought the mums added a bright pop of color and I thought they were a beautiful decoration to add. My wood crate pumpkin was looking cute and elegant. I knew it would make a great decoration to add to my collection.
Finishing My Wood Crate Pumpkin!
The last step was the leaves. I used buffalo check maple leaves that I had leftover from a previous craft. They added the perfect touch to finish creating my wood crate pumpkin. Lastly, I hot glued them in place and held them there until the glue dried. After achieving the look I was going for, I created a few more wood crate pumpkins using the same steps as these. The only things I switched were decorations and paint colors.
Creating the wood crate pumpkin was both fun and easy. It took a little bit of patience when it came to blending the paint and wrapping the twine around the stick. However, it was so worth it. These little pumpkins have made the best decorations for my front porch and have added a little rustic farmhouse charm. Remember to always be careful when using hot or sharp materials as it can be dangerous. Have fun crafting!
I hope I was able to inspire you to create from the heart. Please check me out on Facebook, Twitter, Pinterest, and Instagram. This was a fun and easy craft to make. Please check out my other blog posts and have fun crafting!

Joanie Maristch-Miller says
These pumpkins are adorable. I especially like the big one. Annie, your porch is going to look fabulous.
Akira, you are doing an awesome job with this blog.
Erin Eppler says
Thank you!
Jean Bettelli says
Love the wood crate pumpkins, Especially
The one with the Polkadots
Erin Eppler says
thank you
Erin Eppler says
Thank you so much! I love making unique crafts with crates.
Erin Eppler says
The polka dots are adorable!
homewares and decor says
I really enjoy reading on this internet site,
it contains good articles.
Also visit myy homepage; homewares and decor
Erin Eppler says
Thank You So Much
Bette Hiltz says
I love them!!!
Erin Eppler says
Thank You