‘Tis the Season For A Fun Coastal Christmas Tree
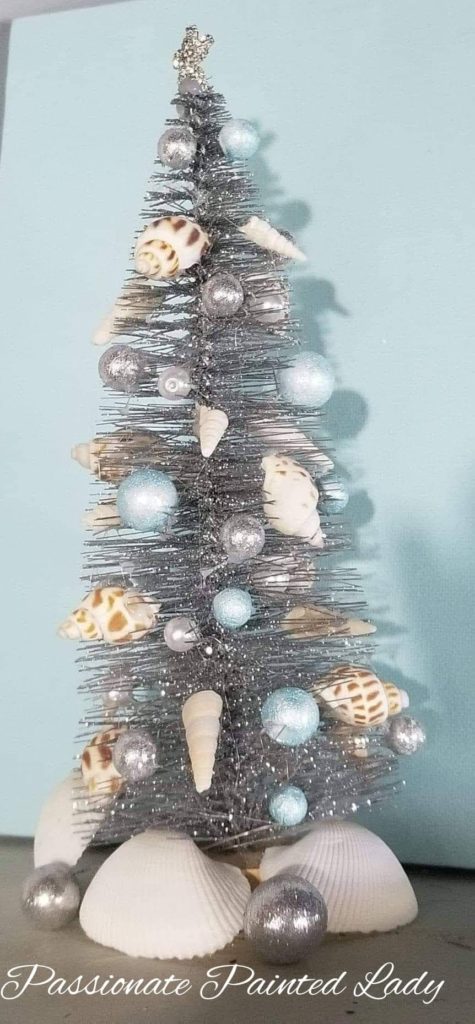
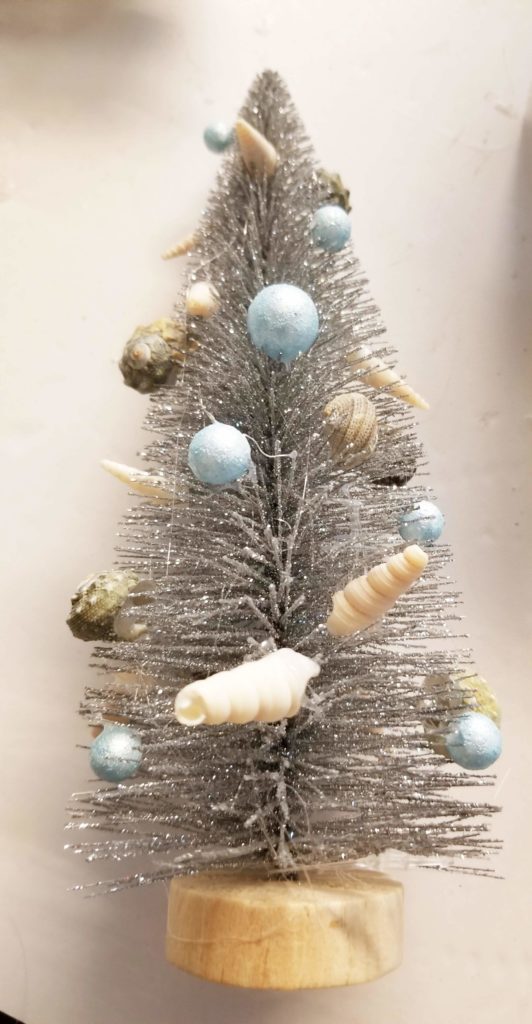
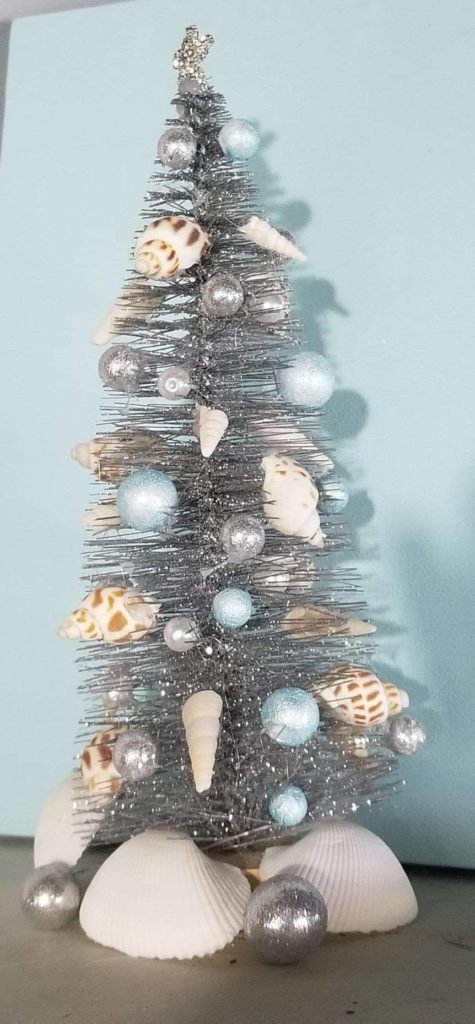
December is almost here, and Christmas crafts are among us! I wanted to start the season with something a little different. Because I love the beach, I created this Fun Coastal Christmas Tree. It differs from traditional red and green, whereas this tree will focus more on blue and grey. I love thinking outside the box and using my creativity to create something new. It is perfect for any beach lover and a great addition to your Christmas decorations! As always, I try to make all of my crafts easy to make and affordable for everyone. This craft is no exception, and it made me smile when I was making it.
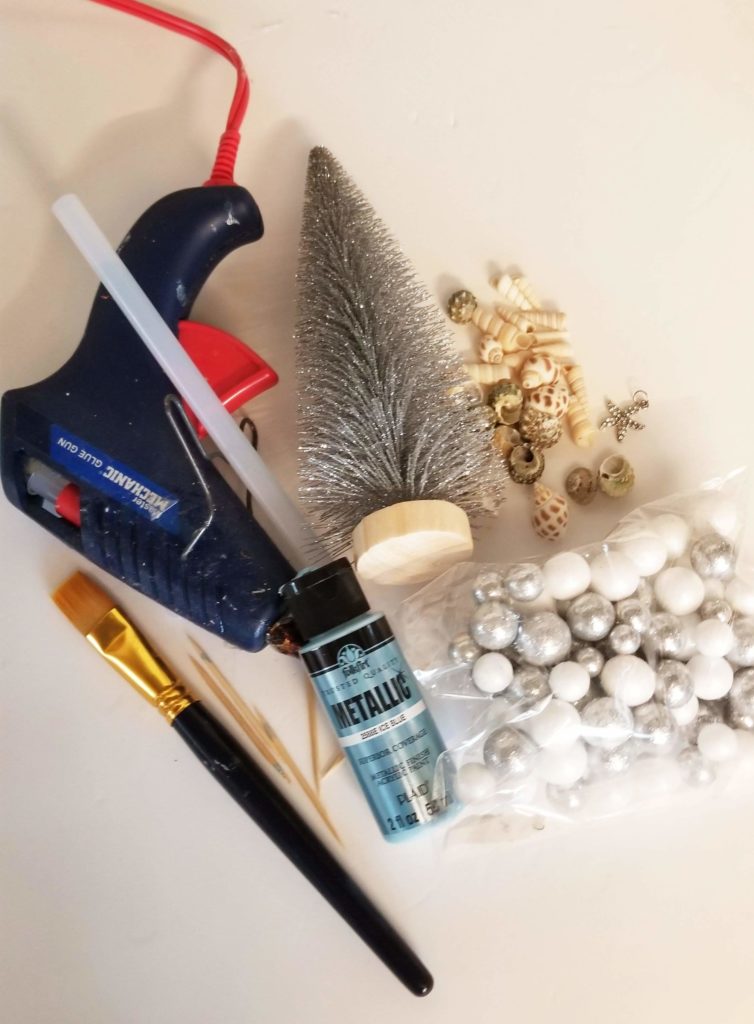
Fun Coastal Christmas Tree Supply List:
- Glue Gun
- Glue Sticks
- Toothpicks
- Styrofoam Block
- Mini Assorted Seashells
- 3mm Pearl Beads
- Artist Brush
- Folkart Metallic Ice Blue
- Small Christmas Tree
- Silver Iridescent Foam Balls
- Ocean Creature Charms
(*This post contains affiliate links. I earn a small percentage from each purchase made through them, which does not affect the item’s price.)
Getting Started
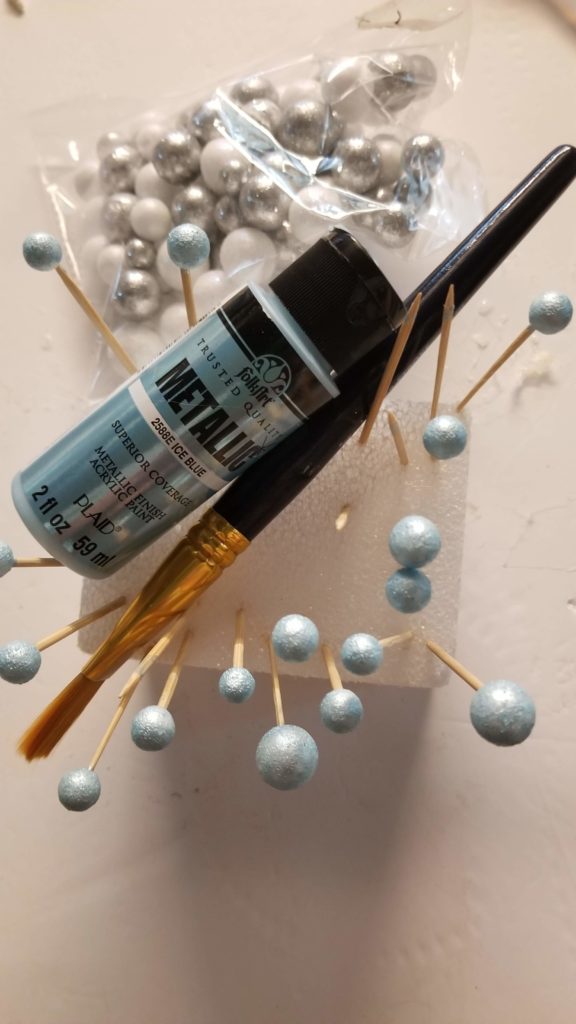
You want to get all the painting out of the way when you do crafts. Since paint takes time to dry, it is best to get those steps out of the way first. I grabbed my Silver Iridescent Foam Balls, toothpicks, and Styrofoam block. I stuck one end of the toothpick into the foam ball and the other end into the styrofoam block, making painting the foam balls easier since you do not have to hold them. Once the toothpicks were all in the styrofoam block, I grabbed an artist brush and Folkart Metallic Ice Blue and started painting the small foam balls.
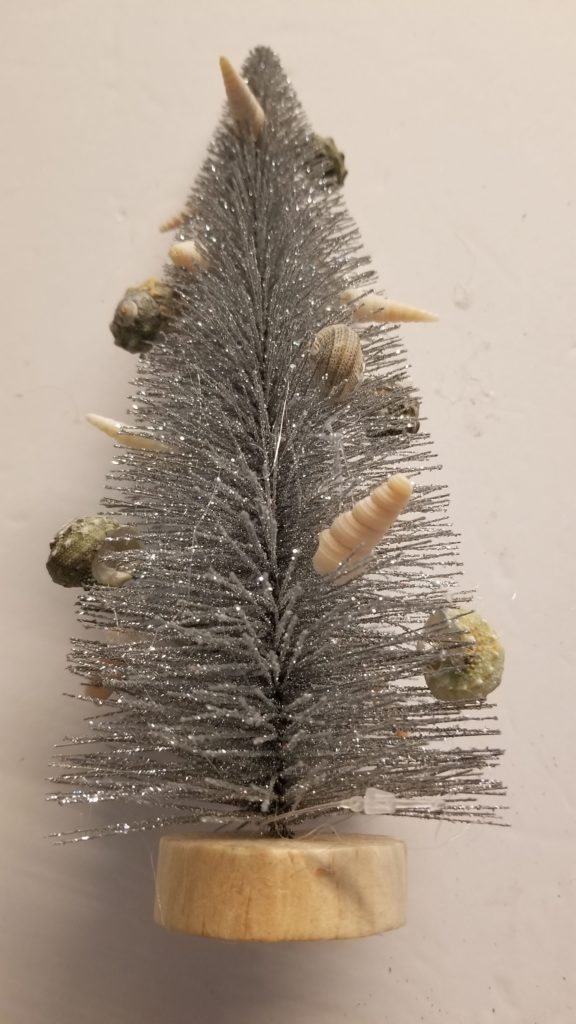
After I painted them in Folkart Metallic Ice Blue, I set them aside to dry completely. While the foam balls were drying, I grabbed my silver tree and mini seashells. I started decorating my tree by hot gluing the tiny seashells in various spots around the tree. When I glued a mini seashell onto the tree, I held it in place until the glue dried and removed any excess adhesive to ensure the tree stayed clean-looking. You want to decorate the entire tree, front and back, to be sure it stays even and does not end up too heavy on one side.
 The foam balls had finished drying when I got all the mini seashells glued onto the tree. I carefully removed them from the toothpicks and began gluing them on the tree. One by one, I held them in place until the glue was dry, once again trimming off any excess. I repeated the same process with my mini ocean creature charms and carefully looked at my tree, ensuring no hot glue strings were hanging.
Finishing Touches
Lastly, I had to glue on the beautiful pearls I had found. I placed a bead of glue on the bottom of the pearls and put them in various spots around the tree, being sure to space things out and cover the whole thing. I took one final look around my entire tree and cleaned up any strings I may have missed before setting my tree down and taking in the final product.
I was delighted with what I had created and added it to my home décor. It is perfectly beachy and fits in well with all of the decorations around my house. This tree was a simple project, yet it came out beautiful and is perfect for any time of the year.
You can watch me create this coastal Christmas tree on my Facebook page if you need a more thorough step-by-step process. I am live on Facebook most nights of the week, always creating different and new crafts.
Please remember to be careful when crafting with sharp or hot objects, as they can be dangerous if not used properly!
I hope I was able to inspire you to create from the heart. Please check me out on Facebook, Twitter, Pinterest, and Instagram. Please check out my other blog posts and have fun crafting!
Christmas in July: Simple, Chic and Classy Coastal Christmas Decor
