From Trash To Treasure
Whitewashed furniture is one of my favorite painting techniques to do. I love how a whitewash creates coastal vibes and how it adds character to the piece. Finding pieces in the trash is an added bonus. When I can combine both, it makes my heart happy. Have you ever found a curbside find in the trash? Personally, I call it “curb shopping.” I find it is nicer than calling it “trash picking.” 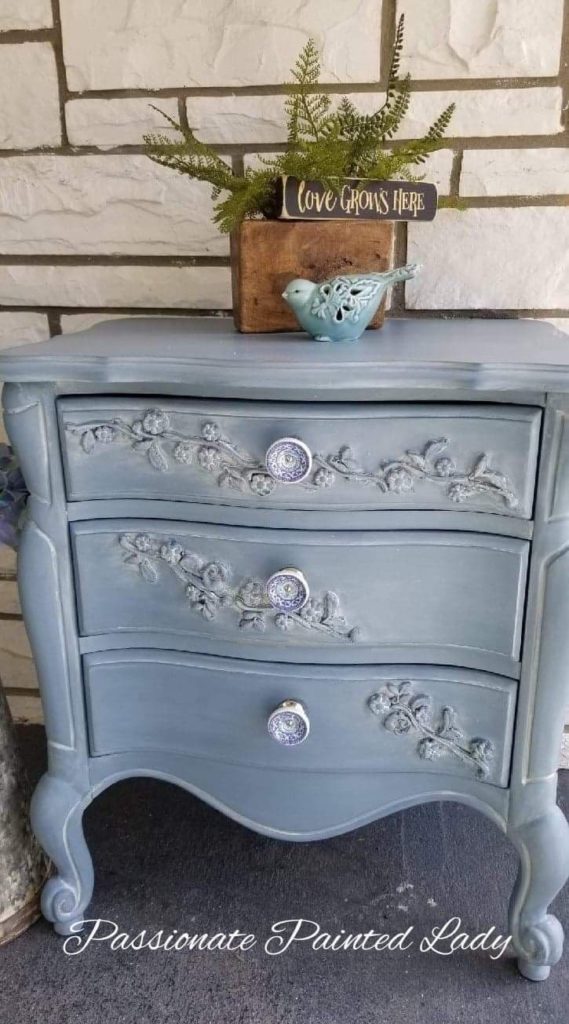
This post contains affiliate links. Using these links will not affect the cost of the product, but I do earn a very small percentage when you use my link. This helps me to keep bringing you great products, tutorials, recipes, crafts, and more! I only represent or recommend products that I believe in and use personally.
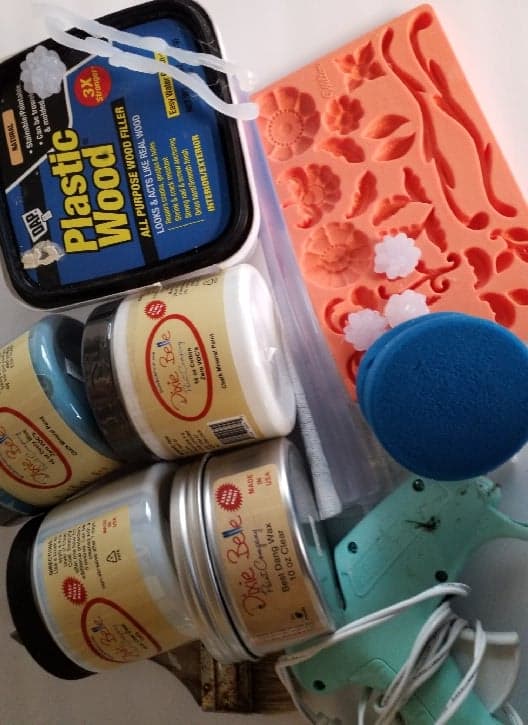
- Dixie Belle Paint Company Dusty Blue
- Dixie Belle Paint Company Cotton
- Dap Wood Putty
- 3 inch Chip Brush
- Glue Gun
- Dixie Belle Paint Company Satin Clear Coat
- Knobs of your choice
- Dixie Belle Paint Company Clear Wax
- Dixie Belle Mini Paint Brush
- Gorilla Glue Sticks
- Lint Free Cloth
- Dixie Belle Paint Company Blue Sponge
- Silicone mold
While driving to the grocery store, I saw a beautiful French Provincial nightstand sitting on the curb waiting to be picked up for trash. Knowing I could make it loved and beautiful again, I quickly turned on my signal to get in the other lane and go around the block. My eyes widened and my heart was racing with excitement in hopes it would still be there when I got back. Yes, I get excited over the little things in life.
Turning on my flashers, I jump out of the car. To my surprise and delight, it was still there. I was very surprised at its condition. Someone totally stripped this piece to raw wood leaving a gorgeous wood finish. I wanted to check out a few more things and make sure there were no unpleasant odors such as smoke, mold, or mothballs. Being a furniture painter, I know from experience that this can make or break a piece. Some smells you can remove, some you cannot. Everything checked out fine, even the drawers were in great shape. Feeling very lucky, I carried the piece to my van gladly. Feeling like I was stealing this trash, soon to be treasure, I placed it in the back of my van. 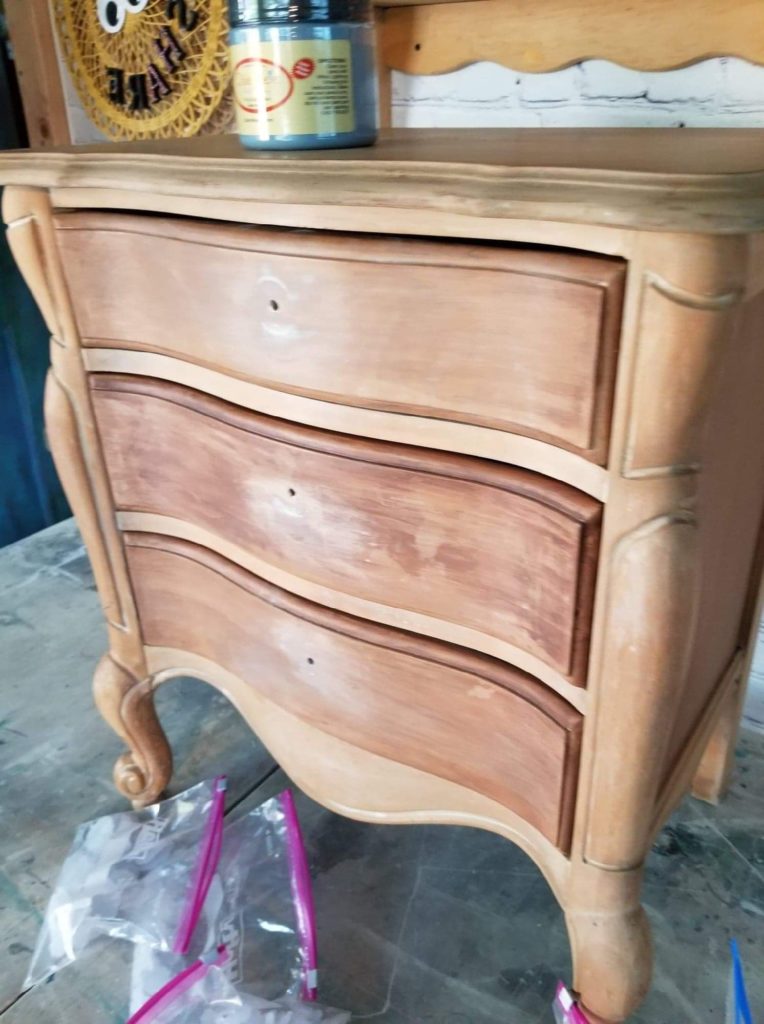
Oh, The Possibilities
I did the grocery shopping in record time that day. Thinking of all the possibilities of different finishes for this gem, I couldn’t wait to get home and unload her. Yep, she was a diamond in the rough. Now it was up to me to make her shine once again. I hurried to put away groceries as fast as I could. She was stealing my attention, eager to get a better look at her. I came up with a game plan.
The Game Plan
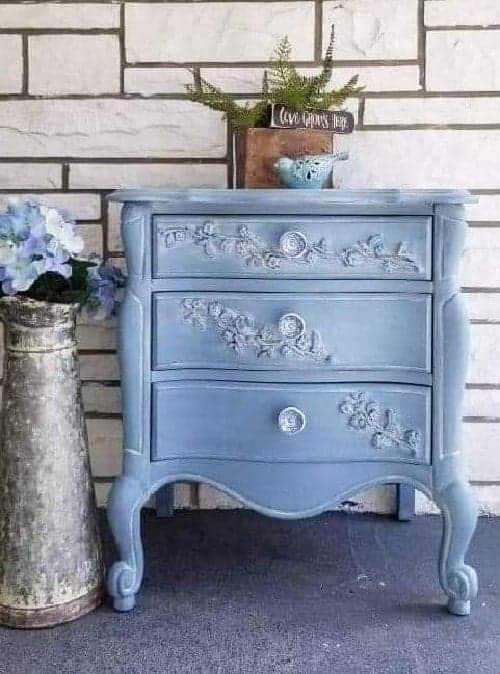
Excited that Dixie Belle Paint Company came out with a new color called, Dusty Blue, I was looking forward to using it, and it was a perfect color for this piece. It was the perfect blue/grey combination. Now that I had the color I wanted something more: something that would make her stand out, something that would dress her up a bit. I had glue gun molds leftover from an earlier project, but would I have enough? I could easily make more if I needed to. Now, all I had to do was minor repairs. All she needed was a good clean up and some minor putty work on the top of her. The putty work would have to dry overnight. Luckily, her drawer fronts didn’t need any repairs. They were in perfect condition.
Creativity Comes Together

While waiting on the putty to dry, I got my glue gun molds out. I knew these would add character and charm, giving her a beautiful new look she so desperately needed. Luckily, I had more than enough left over to create something special for this gracious lady. I wanted to create a beautiful design with the molds, placing them in different patterns until I created a design I truly loved. The design brought out her character nicely. Creating one-of-a-kind pieces is one of my passions.
I heated up my glue gun and happily glued the molds in place. I have found that the best glue sticks to use are Gorilla Glue sticks. They seem to make the molds hold securely. Making sure they were secure and not coming easily, she was starting to change before my eyes. I knew she had great bones to start, but she was turning into the treasure I knew she could be. She’d certainly be loved and cherished once more. I was excited to start painting but I wanted the molds to dry thoroughly, so I allowed her to dry overnight.
Perfect Color Choice
Early the next morning, I couldn’t wait to get her painted. I applied the first coat of Dusty Blue as thinly and evenly as possible. I call this a “scratch coat.” It isn’t pretty, but it gets better with the second coat. You want to wait about an hour before applying a second coat to be sure your piece is completely dry. The second coat made a big difference, giving her the beautiful facelift she needed. You want to allow her to dry completely for about an hour once again. I know not to rush this step from past experience as it’s best to let the piece dry completely in order to get a great result in the end. Whitewashing is a good technique if you want a coastal, french, country look. I figured it would help enhance the molds and give it that delicate coastal feel.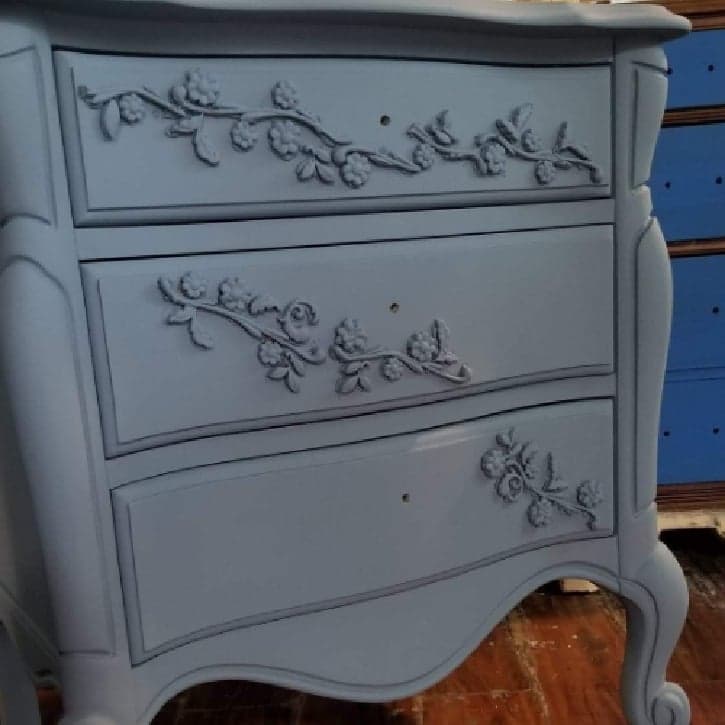
Whitewashing Furniture
Making a whitewashed mixture is easier than you think. It’s a fifty/fifty ratio: fifty percent of water to fifty percent of paint. From the Dixie Belle Paint Company, I used their color called Cotton. It is the whitest of white, perfect for a whitewash! It’s thin, but you want it that way. You also want to make sure it is mixed thoroughly.
When applying, I use a chip brush. The brush I used was a three-inch chip brush. It helps get the whitewash into all the nooks and crannies. They are inexpensive and do the job nicely. You want to apply the whitewash in small areas, not all over the entire piece at once. Being a thin coat, it dries quickly. If it dries too fast, you can spray water and wipe it off easily. Applying the whitewash slightly thicker in and around the areas of the mold allows it to settle in all the details.
Then, using a lint-free cloth, I wiped the excess off then allowed the whitewash to set into the details nicely. This process was repeated in small sections until I was satisfied with the results. I stood back and was happy with the result I got from the whitewash. She was definitely looking a lot better than when I found her. I was so happy I rescued this treasure. The whitewash gave her the beautiful, delicate, coastal feel I was going for. Completely satisfied with the whitewash look, I allowed her to dry overnight before getting her sealed.
Finishing Touches
The next morning, I was excited to get her finished. Because she was now ready to be sealed, I used Dixie Belle Paint Company’s Satin Clear Coat. I applied the clear coat with a blue sponge from Dixie Belle. Satin Topcoat is my go-to because it has the perfect sheen: not too shiny, not too flat, somewhere in between. I applied three coats, allowing each coat to dry before applying the next. Drying time between coats is about an hour.
I applied Dixie Belle Paint Company’s Clear wax next. Applying with a wax brush, you dip slightly and apply to areas where needed. Allowing her to dry for about fifteen minutes before buffing with a lint-free cloth, I was almost there. Next came the hardware: her jewels to finish her off. I chose three beautiful updated knobs. They worked perfectly to give her the beautiful look I was going for. Standing back, looking at her, I was so happy that this diamond in the rough, my trash to treasure piece, finally came together. She was all I could dream of and more.

Bette says
Love it, Annie! 💕
Sue says
More a question then a comment, do u wipe off the white wash with a wet cloth or dry, the piece I’m doing I just want it in the cracks of the furniture?
Erin Eppler says
I wipe off with a wet cloth or I use baby wipes