Easy Coffee Filter Flowers
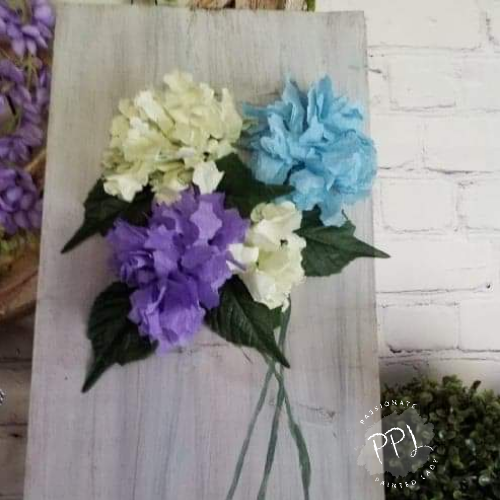
You are not going to believe how easy it was to make these coffee filter flowers. I have never made anything like this but, it was fun, easy, and quick. Crafting is my therapy and I like trying new things so I thought I give it a go. To my surprise, they came out great and it was an inexpensive way to decorate my home.

This post contains affiliate links. Using these links will not affect the cost of the product, but I do earn a very small percentage when you use my link. This helps me to keep bringing you great products, tutorials, recipes, crafts, and more! I only represent or recommend products that I believe in and use personally
Let The Fun Begin

For this project, we are using dyed coffee filters. Dying coffee filters is as simple as dying an easter egg, Mix water with food coloring, soak your filters in the dye solution then remove and allow them to dry completely. Six dyed coffee filters for each flower are what you are going to need. Start with three at first. Lay the three coffee filters flat, one on top of the other. You are going to fold them in half. Then fold them in half again forming a triangle, then fold the triangle in half one more time. This is the last fold making four folds in total. Taking your marker you are going to press against the edges. This helps with making them flat and helps with the creases.
Drawing Coffee Filter Flowers

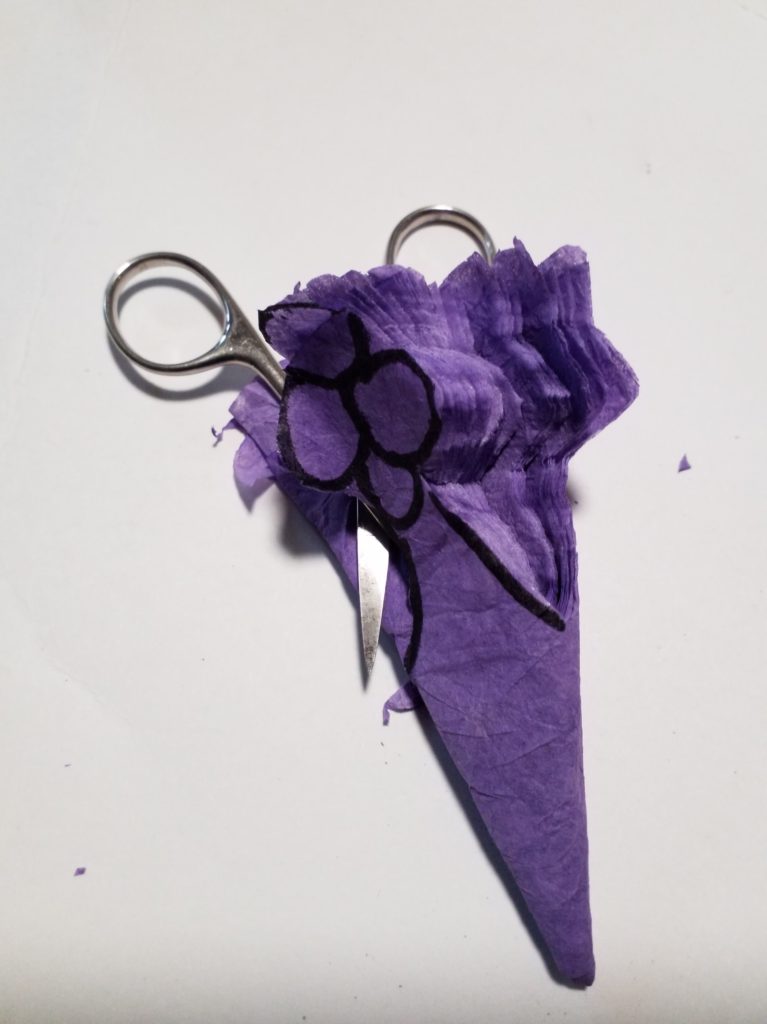
Now that we have our coffee filters folded we need to draw the flower shapes. Trust me it is not hard. What’s great is that it doesn’t have to be perfect. Using your marker you are going to draw four circles at the top of the filter, which creates four petals. Next using your marker, draw two lines along the sides.
Shaping the Coffee filter Flowers With Scissors

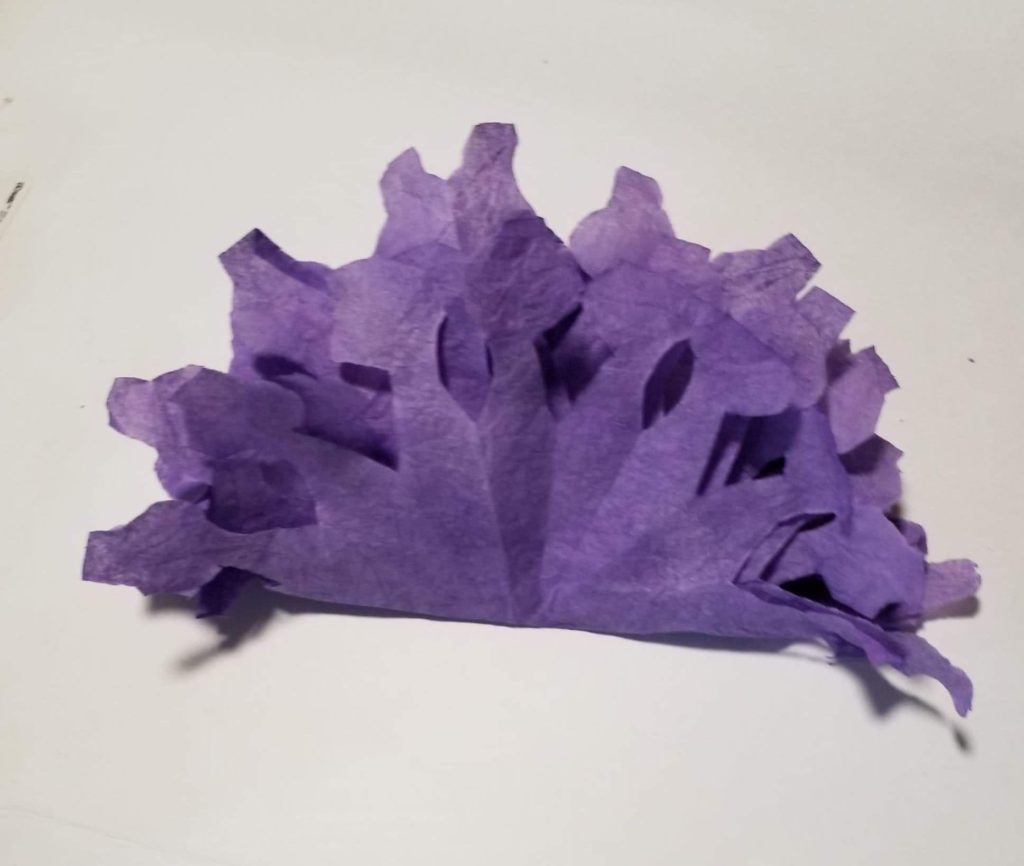
Once done with the artwork grab your small pair of scissors. The sharper the better. Cutting through all of these layers you want a sharp pair so the cut is clean. Starting with the right-hand side with the line cut carefully up to the petals. Once at the top go around three of the petals. You want that fourth petal to connect to the stem. Try not to cut through it. Next cut down the left-hand side of the line. Once you finish cutting around the petals and down both sides, open up your coffee filter. If there are some flowers that are connected you will want to trim them carefully to make sure they form a flower and are not together.
Repeating The Process

Repeat this process with the remaining three coffee filters. I found this to be the easiest way for me. You may find out there is an easier way for you when cutting around the petals but starting on the right works for me since I am right-handed so it may be different for lefties. You will unfold the coffee filters to ensure your flowers at the top are not connected. If they are, carefully trim the excess.
Coming Together

Now that you have everything cut out place all six coffee filters on top of each other. At this point, you want to heat up your glue gun. Once your glue gun is ready you are going to start forming your flower. Fold your stack of filters in half and fold them in half once again to form a triangle.
Finishing Touches

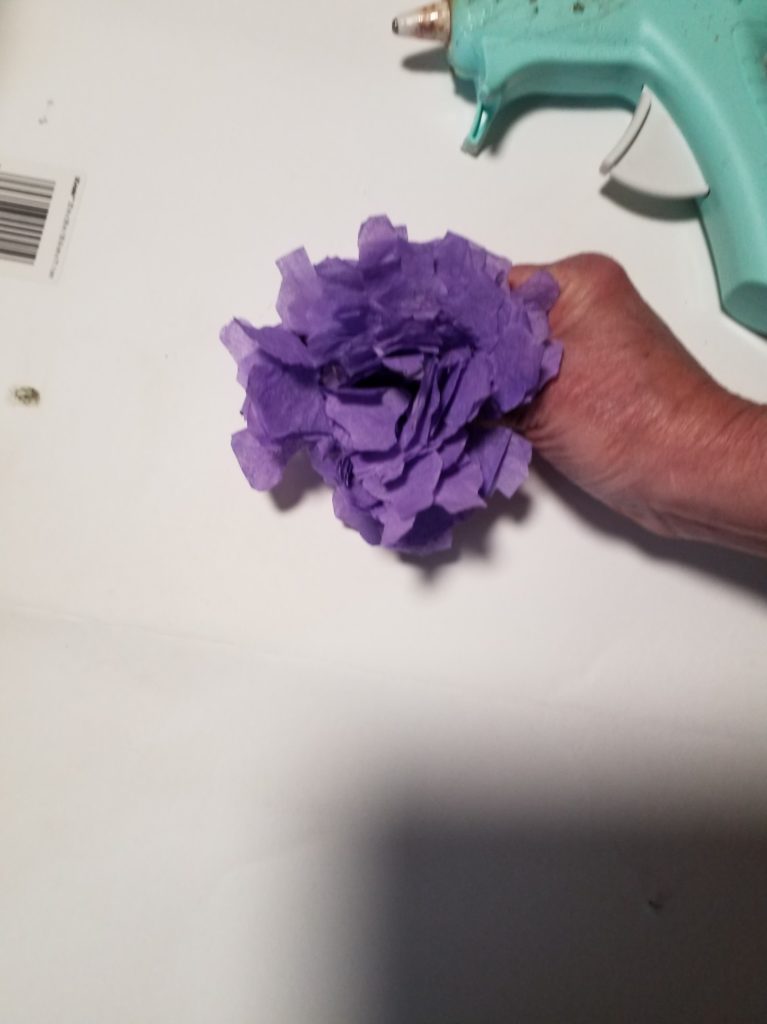
Add a bead of hot glue and fold the flower together. Making sure it holds. Now comes the easy part fluff it out until getting the look you want. Fluffing and shaping to create that perfect flower. These can be used for home decor, shelf sitters, wall decor, and much more. The possibilities are endless.

If you enjoyed this fun craft, check out the links below for more great ideas!!

JoanieMiller says
Your flowers are so pretty, Annie. The colors look very authentic.
Kathleen Cottone says
Annie thank you for sharing this 💜💙💜💙